Hindsight is 20 20 as is the key to this How to. I will claim top be the first to put power to the roof way back in the day before anyone ripped into the interior or drilled holes in the roof. Link here.
http://www.thenewx.org/forum/showthread.php?t=1064 We have come a LONG way in 5 years! My install goal then was, in this wireless age, Wireless! And it is still a great no wires shown easily removed and installed light system with loads of light.
Now into the next generation on the Next Generation Xterra that BTW Nissan is going to can soon merging the Pathy and the X into one.
You must read Rev's How to 1st to understand mine.
http://thenewx.org/forum/showthread.php?t=17744I did his and just tweaked it a bit. And this one is with no AMP in the rear. And done on Mcampana's X. (What a monster that truck is!
We have come a long way in available switches and with a little extra money tossed in, we can prepare ourselves by leaps and bounds for future electrical upgrades.
This install was based of Rev's lighting system how to. As with each install we tweak it a bit and make options. That's all I am doing. And had I to do it again, I may tweak even more. I'll mention that along the way.
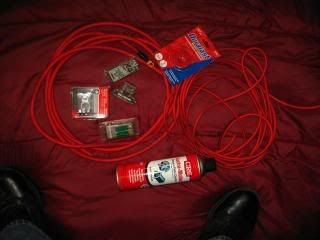
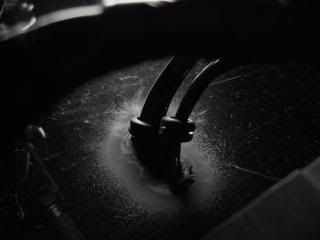
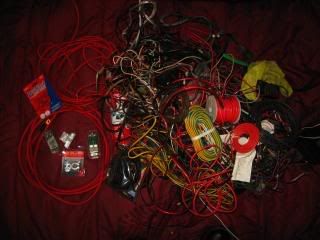
Above you see the wire. This isn't Wal Mart Amplifier wire, You would have to hold it to realize it's flexibility and it's massive copper content. This wire although is as flexible as a shoe string. It's about $2 a foot at a local Stereo shop. Run a string along the route you will cover and buy what you need. I went 4AWG to a split into 8 Awg.
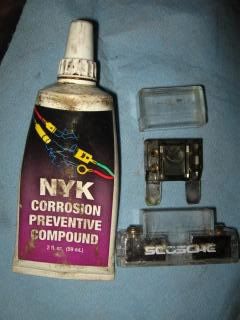
Less than 18" away from the battery you should install a fuse block like this one (Bonus it has a cap!) this You CAN get at Wal Mart. Buy a pack of fuses for it also. I have been told by my Stereo shop friend not to use the Glass Tube type fuses as they melt, and he had a box of brand new ones that he won't even give away, so he must be serious. Use Blade Fuses. Also pictured is Corrosion Preventative Compound AKA Bulb Grease. Buy a whole can or a tube as shown, coat everything from each connection to every fuse and where it plugs into , All plugs and anywhere you meet a washer with a metal object or bolt. Trust me. If you ever seen a connection go to a turquoise colored dust you now what can happen and this stuff prevents this corrosion and allows the plugs and fuses to slide together easier.
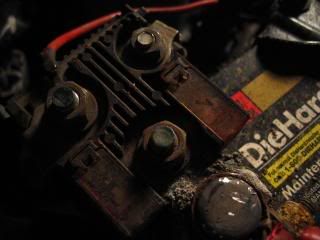
Before Positive. Remove Neg 1st, Then this and clean, clean clean.
After Pos terminal.
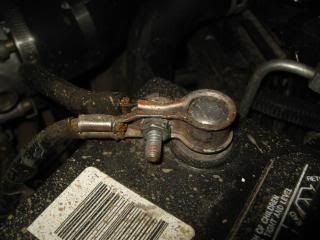
Before Neg. face it! Nissan screwed us on this Neg Terminal. I found a fix. What happens is, It gets loose and will not tighten and this can cause all sorts of problems and may even fry a computer, so fix it! And, it can leave you or your wife stranded. You need a good ground!
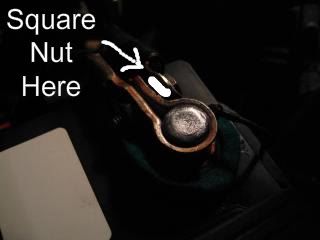
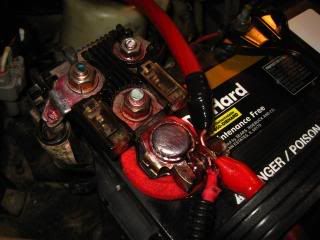
Above is Negative After. Take Negative Bolt completely out, you may need a New Bolt (Longer) but obtain a Square Nut that fits next size up on that bolt, (You are using it as a washer or spacer now) Clean the Terminal up and install as shown with the new Square nut in this location. This nut will provide more clamping power and keep the terminal tight. Also while terminal is off bend it back into shape so that it comes off the round part at right angles and goes to the holes. (It will be kind of out of shape due to sorry Nissan engineering.)

Battery properly prepared and cable installed. this should last a good long time. The ground is very tight to the battery terminal now and that is what is needed.
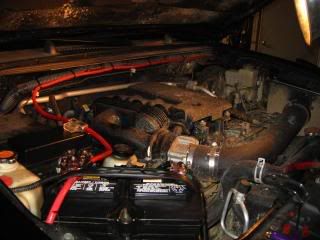
Above you see properly installed wire to power the distribution block in the driver side kick panel. From a newly serviced cleaned and coated battery with terminal protectors on the battery, Less than 18" to a Blade Fuse Block with proper size fuse, then I choose to follow factory routing of wire harness along the fire wall because it is away from the heat of the Radiator, not right up front to become a welding wire in a crash, (Joke) and it's out of the way and if you secure it against the current Wire loom as shown it has nothing to chaff against. You can Loom this wire if you want, but this wire is so kick ass I had to show it off, and, it has the thickest insulation I ever seen on a wire in my life!
Pictured later is power to the Kick panel, Now that we have that... you want to start at your lamps and work Back to your power source. (Kick panel) But first, I did not like the look of the green and Black loose wires hanging out of the Hella lamps, Kind of tacky if you ask me. So I used a few tricks to clean this up, Follow along you will use this info in other electrical installs.

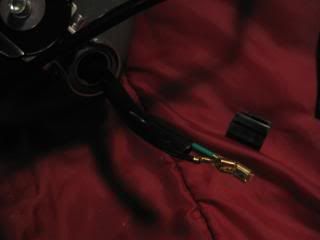
The ugly loose wires, What are they thinking?

Ok see that clip on that Green wire terminal? You take something very small, I have a special wire harness tool but a large safety pin will work, You stick the safety pin into the plug and release that clip and the wire will then pull out the back of the plug. be SURE to remember where it goes, Use the other wires as a reference. This wire has to go in same hole it came out of on the plug.

Bad picture but you see that square kinda hole? That is your clue as to where to stick the pin to release the terminal from the plug, Some plugs have this some do not. Practice on some old plugs and you will get the hang of it.
With the plug off I now use some seamless wire loom I stole from the Hella Harness and put it on each light to cover the loose wires. I then coated the terminals in the bulb grease and squirted some Silicone in the light end of the loom to seal it up, Then some more Silicone in the Plug end of the loom to seal that end up and then re-installed the plugs onto the wires. You want to thoroughly coat all parts of the terminal with the CPC or Bulb grease but too much can cause a loose connection that can be fixed by massaging the harness at the plug. I used too much but I want it never to corrode. SO more is better for me.
Light with sealed Wire loom on top, this is the end light so a wire comes in here from the light further down. Each light still has it's own plug in case it gets broken it can easily be replaced without disturbing the custom harness.
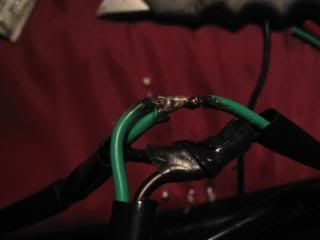
I then bring wires to each set of lights and soldered the other plug to that wire harness which goes through the roof and into the kick panel. After soldering I lightly coated the connection in Bulb Grease and then wrapped it in 'Rescue Tape' (look that up) and then a quality electrical tape. This should ward off corrosion completely and make for very strong and solid connections. This was my ugly solder job before the gun got hot, I fixed this later but no pic. ha ha.
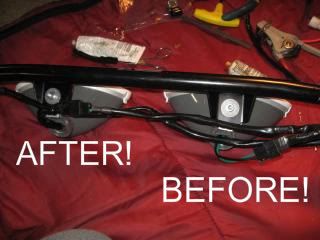
This picture shows what the wire looks like before you pull the plugs and loom it and after. I vote for after. You can use split loom and skip this step but this is Mark's X.
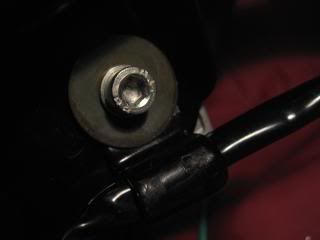
Each light bolt sports a wire clamp to hold the harness in place.

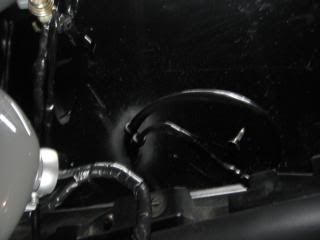
This is what it looks like under your roof bin people! Get a life! Take it off now and then and put some sort of stuff like silicone on the bolts that hold it on or someday it won't come off. I almost had to use a 3/4 in drive impact to remove this roof bin.
Ok by removing the rubber seal at the top of the drivers door trim, (Just pull it down) you can gain access to the headliner underside and stick a stiff wire in there and figure where you want to drill your holes. I used two holes because he wanted two separate circuits and I had 4 wires with 2 power and two grounds. It was two small holes or one gigantic one! I spray painted the Fresh metal and used silicone on the grommets to prevent any leaking. The grommets that come with the Hella Lights will work. NOTE! When drilling the hole put a section of PVC pipe over the drill bit that will only allow about 1/2 inch of the bit to show, that way when you drill down the PVC will stop the bit from going through the headliner below! I also used an old truck mudflap above the liner and below the roof to catch any metal shavings so they do not sit in the roof and rust.
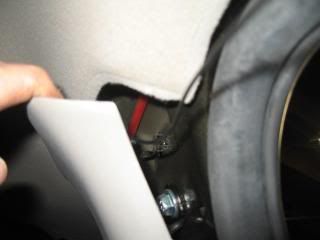
you use a stiff wire or fist tape and fish the wires from the roof across the headliner and then bring them down the Driver side Pillar and into the kick panel. You want to stick towards the forward part of the pillar and reach up from below the kick panel and bring them down as opposed to running the wires to the rear of the pillar and just under the rubber seal. When done they should run down the front of the pillar and go into kick about in the center of the bottom of the pillar.
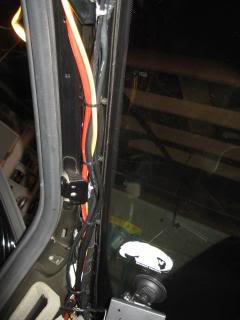
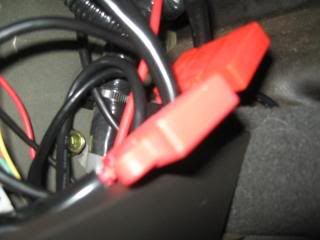
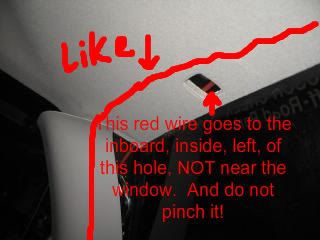
Like this! (See red wire) I fit 7 wires down this location, 4 from roof lights, and 3 from the rear roof lights.
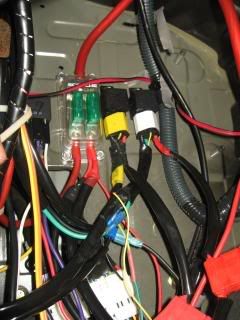
Above is a pic of finished Kick panel, The wire we just run comes into the kick panel and is run into the Distribution block from the top. Then Two wires come out of that and one goes to power the rear roof (An 8 Awg wire) and another powers the lights on the front roof.
Note: Mark also insisted on having the lights be controlled in the front in pairs, he picked two Hella Fog Lamps and Two Hella Driving lamps. We separated them with separate
Grounds and Power wires with relay's. The Yellow taped relay controls the Front FOG lamps and is activated by the dash switch labeled FOG Lamps.
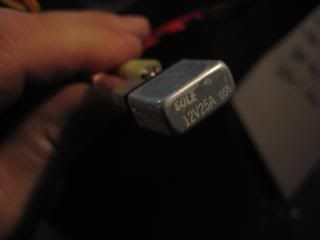
The White Taped relay controls the front Driving lights and is activated by the Driving Lights Switch on the dash. This is two of the 5 Relay's we used on this install. We used parts and sections of the Wire harness that came with the lights, We chopped and extended as needed to fit the application. At bottom you can see two sealed RED Fuse holders, These are for the front roof lights. So, there are a total of three fuses between the battery and each set of Roof lights. 100 or 60 Amp at the battery, Then the 30 Amp in the distribution Block and then a 25 Amp in the In Line Sealed Fuse holder. theory here is the cheaper fuses will blow 1st and save you money and all the protection is there. By separating the circuits, we should always have lights even if one set develops a problem. (I seriously doubt it)
The fuses, closer look, they tuck in kick panel but easy to get at.
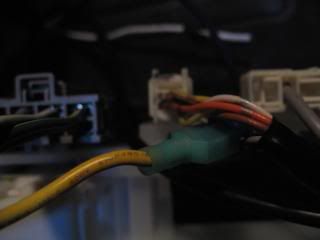
While we are in the kick panel. Above shows where you hit the parking lamp circuit. I used a blade tap and plugged the 86 terminal of the relay here. You must relay this circuit as it does not carry enough power to light the switches on it's own. I think this was a Gray wire. Use a tester the pic shows you where it is at. remove lower kick panel to expose.
To complete, the 30 Terminal on Relay goes to a in line fuse, then to Battery power, the 85 terminal goes to ground, and the 87 Terminal on this relay will go over to your switches. If you wired it right, You ground a test light and put the pointed end on the wire going to the switches (87) and when you turn on the parking lamps the test light should light. This will hook to the Bottom terminal of the pictured switches in this install and will power the Low indicator light on the switches which will come on with the parking lamps. NOTE: Some people hook this up so it comes on with the Accessory but why burn lights when you can see them in daylight? This is Relay number three in this install. The relay is mounted in the kick panel also and close to where it hooks to the Parking lamp wire. This relay and wire also power the switches! you only need like 5 AMPs.
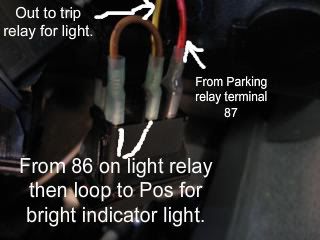
Now let me explain the switches. Rev shows the loops you can make. I will explain further. As shown the top of the switch is to the left and the Right side of the switch is shown as you look at the front of it. Now. On the other side there are two terminals, They are grounds for both lights in the switch, a low light hooked to the parking circuit Power and a High light that comes on when your lights get power. Thus the Loop from Yellow to brown. To explain, Power comes from the Parking lamp relay, into the Red wire, When you flip the switch it goes out the center Yellow wire and flips the relay for the lights.....at the same time the power goes out to the yellow wire it goes out the brown wire and gives power tot the Pos terminal for the brighter indicator light on the switch.
If you have 4 switches they will share all grounds Make one wire with 8 female spade terminals and connect it to all the terminals on the left side of the switch this side will only have two terminals. Now get to the side with three terminals. The bottom terminal supplies power to light the low indicator light. Come from that parking relay terminal 87 and to 1st switch, loop to second switch and 3rd switch and end at the 4th switch. This is the red wire as shown. Parking Lamp Relay terminal 87 POS with Parking lamps on! This wire powers the switch! The Magic and REASON why you WANT to hook it this way is.... the lights will not come one UNLESS the Parking lamps are ON! This way you are unlikely to leave your lights on by accident as the X has a built in audible reminder! Plus! You can be in the dark and turn on all your Aux switches and when you turn on your Headlights ALL your lights Blast on! Great for sneaking up to that college couple in the park one night at 3 am. If you choose the Acc. Option your lights will have power on every time you start your X and it will be burning your switch bulbs needlessly.
Ok now, on the center terminal of the switch (The side with three posts, Yellow wire as shown. That will be different wire for each switch and each set of lights or light.) This center wire goes to the 86 terminal of the relay for each set of lights, It trips the relay which then sends battery Power from the source (Power) to the lights. Now, follow me, When the lights are ON you want the brighter (High and top) lamp in the switch to illuminate that is what the top right terminal does so you just loop this Yellow wire to the top POS terminal for the bright switch light (I used a Brown Wire) As shown.
I hope this clears this up. Marks switches came with directions for another model switch so I had to figure this out. It's a great switch! Buy em!
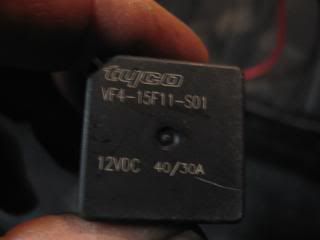
This is a good quality relay, There are many kinds out there, they all work when you get them, the better ones work a lot longer than the cheaper ones. The Hella Lights came with some pretty good ones. if you have to buy them I suggest a Commercial truck Supply such as Kenworth or a Waterproof type at Auto Supply stores.
Directions come with the Rear Light bar. I prepared the light bar the same as I did the front light bar. Hand made Harness, all sealed connections but yet serviceable to change out the light hardware. By running 8 Awg wire to the rear we have massive power supply close to where it will be used, this should give you best lighting with least problems. And less wire as you trip rear located relays with the switches and light wire.
Understand? This is a fused 8 Awg Power wire that goes to the distribution Block in the kick panel.
The 8 Awg Wire in the rear ends into this 30 AMP Blade Breaker! It can be a fuse, but since it's a little out of the way Mark choose a Breaker, if his lights keep flashing on and off he knows the wire in the headliner has shorted out. It is also fused at the distribution block, so double protection.

Pic of good ground in driver side rear pillar. Use it!
I used some split Trailer wire harness to run Two trip wires from the switches to the 2 relays I have located in the rear Pillar. Both relays are powered by an 8 AWg wire run up from the kick panel and up the pillar then along the inside of the car in the headliner on the drivers side and down the pillar in the driver side rear. You just pull down the rubber seals at the top of the front and rear door jams and then remove the ceiling cargo hook and run the wire to the inside of that hook under the headliner.
Mark wanted two circuits back here. #1 Is the power for the Backup lights. #2 is power to the center two prong plug. This will be used for a flashing strobe yellow light in case he stops on the road or needs visibility otherwise. A good safety feature. I put a two prong plug on so the flashing Light can be plugged into it OR an adapter that can be plugged into the two prong and supplies a Cig lighter female plug for a spot light or whatever.
Wire as follows,
Red 8 Awg to Breaker, Two wires off breaker one each goes to the #30 terminal on each Relay. #85 Terminal on Each relay Goes to the good ground pictured above. #86 on each relay goes direct to the center of the three prongs on the back of the respective switch on the dash. (Backup and AUX) #87 on one relay goes to the backup Lamps and the other relay #87 goes to the center two prong plug. test before you put it back together, if the wrong thing happens switch the #86 terminal relay wires. if the Backup lights come one when you turn on the backup switch you are good to go. The relays drop down in the rear panel with the terminals facing down so moisture does not collect on them. Leave wire enough to do this.
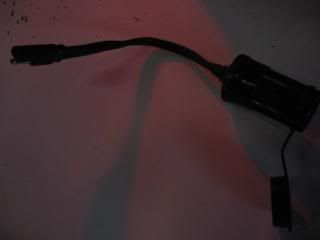
Two prong adapter that plugs into rear wire harness where strobe light also plugs in.
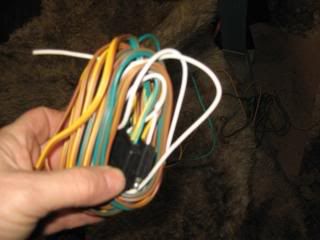
Ahhh some of what I used. Sorta, not all of it. Lots of chopping and harvesting going on this install. LOL
The relays are easily accessed just by pulling the panel in the rear.
This is an install that should be taken in steps, I'm not going to say it took me 3 hours like some people do. It was pretty involved making the wire harnesses and soldering connections, sealing them, installing loom, taping, Wiring 5 relay's, running the lines, installing the switches and working around several other previouslu installed items such as Sat. Radio, GPS, and other Aux items. Take your time, split it up, Do it as you can afford it and it will be fun.
But nothing and I mean nothing is more fun than flipping the switch and having these lights come on and light up what was previously a nice dark spot. Especially the Rear Backup lights! These are a too cool gotta have! So wire for the future! God said; "Let there be light!" and there is!
And Rev will link me up to his How to.


