That last picture still has me laughing! OK on to my instructions.
Step 4 a DON'T do this! Just look! This is how it will look when done. I don't want you to put this on yet, PITA if you do, it just pulls off maybe use a open end wrench to pry it off?
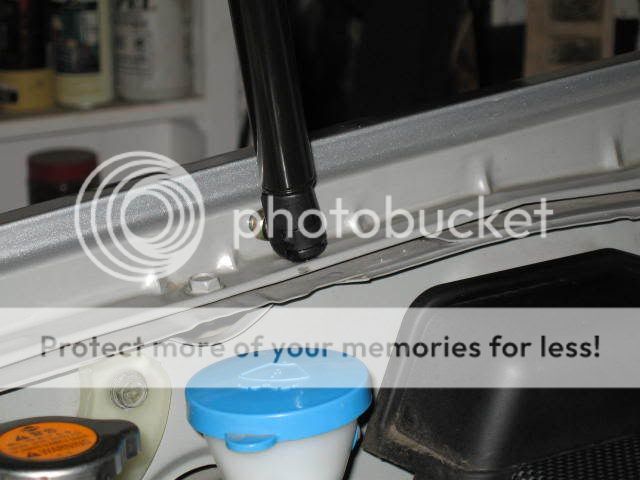
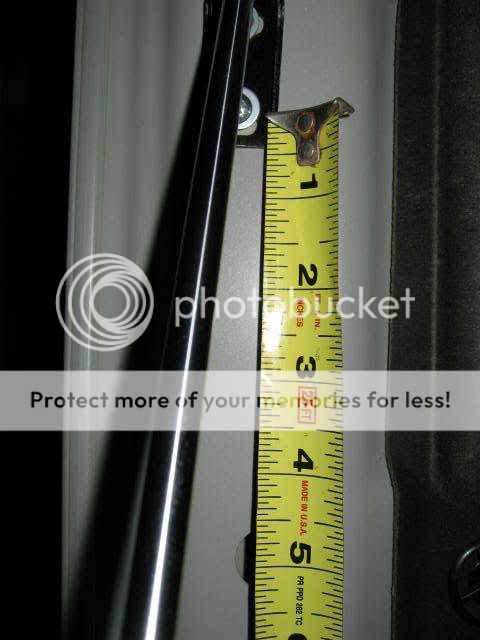
Step 5. Install the bracket. Now you have to use the PVC trick if you are not using self tap screw (not suggested) or just install supplied bracket as shown where shown. Make sure your screws are short enough. It's kinda at the bottom of the crease in the hood and centered as shown. The screws go in 2 inches from the edge of the hood. Do the top screw 1st. Keep in mind your goal is to not drill through anything important!

This gives you an idea of where it goes also.
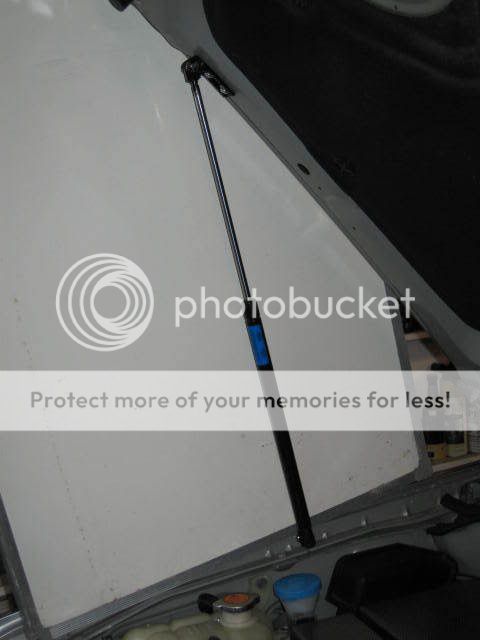
Step 6. Now that you have the bracket installed with both Short Self Tap screws with a washer. You are now ready for the Mighty Lift install. 1st drape a light color sheet over the engine compartment, you will drop one of these washers and never find it, then you will go gank one out of a package at Autozone and I'll be going in to buy it and get ripped! Blanket in place, take the Mighty Lift and the stud that goes through the bracket install Stud, now a white plastic washer supplied, then slip hole of Mighty Lift through and here is the hard part... the other white plastic washer, Now poke the stud all the way through, and put the retainer clip on. The Mighty Lift should be swinging by the bracket. Now, Just swing the end towards the stud and it just pushes on the stud. You are done! It will work! But it's kind of weak eh? Like a limp d&%k. It will hold the hood up though!
Step 7. On now, Bar a strong wind, the lift on the pass side is holding up the hood. Remove the hood rod as shown.
It pulls up towards you at front spins left and push towards engine from pass side as you dip the tip of it towards the roof rack.
It comes out easy, it's a puzzle, don't use any force that would damage anything!
Like this:

Then this:

Step 8. You want to kind of copy your measurements from Pass side and duplicate it to Drivers side. Mind you I have left you about 1 inch for error. Try not to use it.
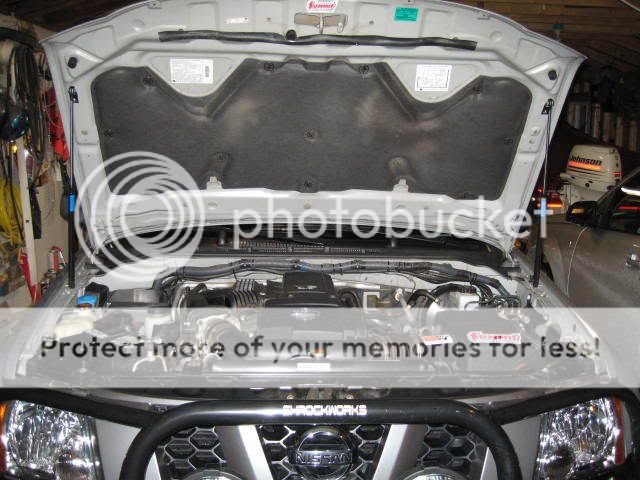
Step 9. Now that you have both installed the hod will stand erect as a teenage stud! Hold on there! Whooo feel the stiffness! That puppy opens wide and stays put but shuts easily!
Pictured complete! Notice it holds hood up much higher than the Rod? Almost to Max!
I LOVE this MOD! The subtle WOW factor! And I love it more with CMHX's update! Always comforting to know someone has copied your work, improved it and liked the MOD just as well!
Thanks once again to CMHX for the cure to my problem making this mod easy for all to do. I only do these How To's so you can get an Idea what is involved and possibly do it if you want to. I can't take any responsibility for the absence of good mechanical know how, proper tools and skills to do the job. But, You can do it! Thanks to all who have done my MODS and some who have helped make it easier for others with tips! MC
- Code:
-


