UPDATE. 4-1-07 I have 30K miles on my Daystar, I recently (19K miles) did an in depth check of all the parts and install. No problems. Works perfect Added the Timbren co Bump Stops for towing and to add stability in front with the weight of the winch and shrockworks bumper.. Timbren is Nice Add on for that. I also did ECXC and no problems at all!
Just to separate it from Ac's. Daystar lift is different in many ways.
First, Total cost will be in the $400 to $450 range with the alignment.
This is the end Result, look at below posts for more pictures of others that have lifted. Good control is retained with the lift after alignment.
The below X has BFG AT 285 75 R16 KO's $940 At Sams Club For 5.

I wanted to report that I took pictures of measurements before and after. The front spaces only.
Before was 34.5 After is 36.5
That is from ground to fender well center. After installing the rear, that bumps it up to a clean 2.5 to 3" Lift I am going to let it settle before I report final measurement.
I posted good directions in Front Strut removal. So later on people just changing struts can use them. Here they are:
If you need to do this,
Look at Dan's site directions and pictures. 1st.
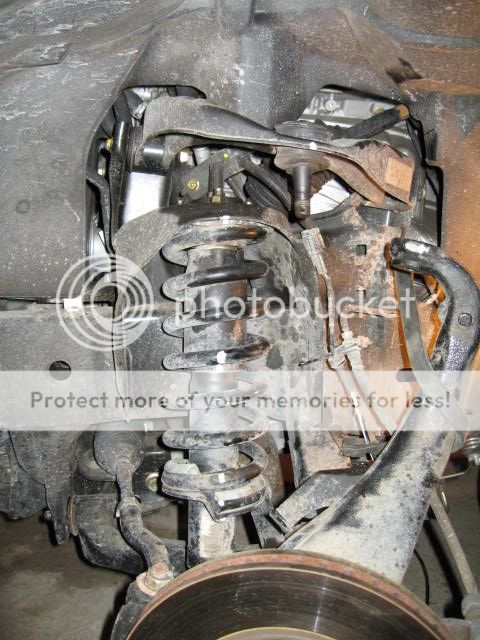
Using what you learned there proceed like this. It's very different from an AC lift because The daystar spacers will not fit into the hole that the AC lift will. You will have to remove the lower ball joint NUT ONLY and break the Upper Control Arm from the Ball joint at the thread only! The Ball joint actually stays on the upper control arm!
This was Taken from Daystar Directions And I added some steps you also need to take. Plus any info from post installers.
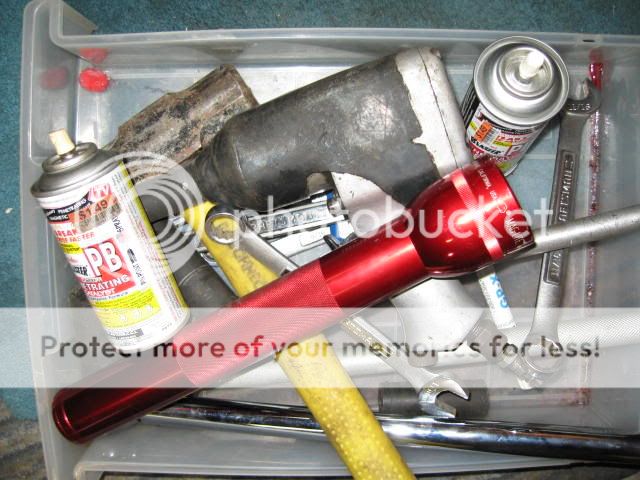
Soak all nuts with the lube you use, for parts that is. Use park brake, Chocks, and jack stands.
2. Raise both sides of vehicle until front tires are off ground.
Support vehicle.
3. Remove the front tire and wheel.
4. Remove lower stabilizer link bolt both sides..... spin sway bar forward
out of way.
(upper links still attached to bar) (a) remove ABS line from 3 points, it slides out.
So you do not over extend it when you remove spindle from top.
5. Remove upper ball joint cotter key and nut. (100 ft lbs to put back on)
Put nut back on, tap
side of spindle then tap nut up, it should drop out.
The upper control arm will float up out of way.
You do not remove upper Ball Joint from truck at all!
So don't jack up the rubber!
Spin that out of way, it moves all directions.
You may Use a Rubber strap to hold it where you want it.
6. Use 9/16's to remove 3 triangular positioned nuts on top of strut.
(DO NOT REMOVE CENTER NUT or you will get a face full of spring!)
Use 3/4 to remove bottom nut and bolt.
Strut will come out through top easily with plenty of room.
Note, You will use a jack on lower control arm to relive pressure, jack and lower things into position. Install your lift parts or new strut and spring or take to shop for re-spring. install in reverse.
Use anti seize and thread locker blue if you want to ever get it apart again. Re check for tightness after 50 Miles.
I don't think I took enough pictures, so who goes after me take more. I did not realize the AC install was so different. Even though Dan's pictures show that.
I was missing the part you don't see here. Dan At Daystar sent it right out. And so Did 4 wheel parts, so I went from not enough to too much. But this is a look at what will be installed.

Tools needed. LOL I like Dan's list better. About any manly man will have all tools needed.
OR you can borrow them from my kids girlfriend.
Shot of ready to extract. You see the gigantic hole it leaves and how everything falls out of way when you just disconnect the upper Ball joint?
Notice Ball joint stays attached to Upper Control Arm! 1st side takes like 30 min, second side less than 5 (experience)
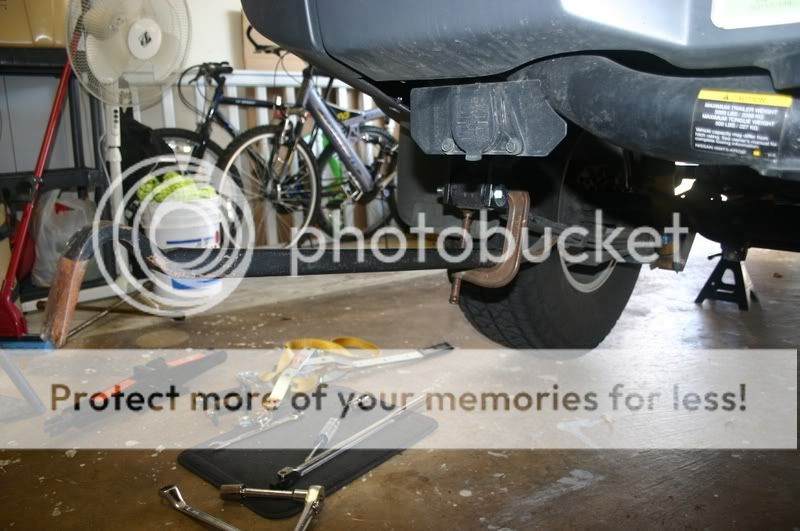
Ok here is how you rig to take a shackle out without swinging a hammer.
Normal Ratchet binder, crank crank crank, adjust jack until it falls out.
You may also need the same rig to move leaf spring during install.

Here it is on the out swing, showing hard to do side, you have to finagle the tailpipe ESPECIALLY if you have a hitch! I pulled bottom out 1st and top came easy. A foot was involved, and a hand and a half. Others have removed the rear Tail
pipe mount to allow more room. For even more loosen next one FWD too.

Aftermarket slides in easy. Put top in first.. Use a bottle jack for optimum control, notice block of wood evens out at bottom, jack until hole lines up, or just past that and let a little off jack and catch the hole as it comes down. When you tighten it, remember this part will move freely make sure it does after you tighten it. Snug is the word.

And here is another way to do it if you don't have a bottle Jack and do have a helper. Suggestion and Pic by: Speedy_Parker
"Also, I came up with a way to lever the springs down to the new shackle mount point: Just apply downward pressure and viola - slide the bolt in...
That's just a 3' pry bar and an old C-Clamp... Speedy_Parker"
Lube Daystar's before you put the weight on it. Then after 50-100 miles. On a Daystar the bolts are 11/16 one side and 3/4 the other. I like it when they do that, you can change them out with one set of wrenches.
I took it for an abuse ride, to try to get the Hit some people get on the upper control arms. I don't get any hit, But I have an S not an Off Road. However
B Slater Does have an Off road and he did not have the UCA contact either.
I love the lift, It was super easy to install and takes hardly any time if you get all the parts in your kit. It looks durable and the grease able shackles for me is a gigantic plus. I painted the parts pretty fast to disguise I had done a lift.
Off to Firestone for that Lifetime Alignment! On Sale Now! $99.00 (Reg $148.00 = local Tax) Great tip from
Muzikman.We hope you got some ideas and helped you save time! Thanks to all who did that for me in other how to's.
AT ECXC The END!
You saw it at THENEWX.ORG 1st!
05 Pioneer's
Input for this Post from
B Slater and
Muzikman And a lot of info was mentally ganked from
Dan's site!
Picture B Slater's OFF ROAD LIFTED X in SUB ZERO TEMP's! It was
SO cold he saw a lawyer walk by with his hands in his
own pockets!

MC


