It's hard to spend money on a no see Mod, but this one is well worth it in handling!
I bought it to increase towing stability as I tow a dozer at times and a boat a lot.
The handling was a gigantic BONUS! Hindsight I'd do it just for that!
PS: I tried AIR LIFT Spring kit, don't waste your money it limits Droop!
Timbren don't!
What it is and what it does can be found here:
www.timbren.comIn short, for me, increased towing capability, much much better handling without
Rear sway bar installed, and Cure for nose diving front end with winch and winch bumper.
Restored all handling characteristics that the 2.5 inch lift took away. F&R Totally!
Where purchased:
http://www.truckspring.com/Vendor gets A+++ Good e mail contact, read notes on internet order,
went out of way to make sure I got the right kit with spacers for rear.
Good ship notification and quick ship!
Kits cost $154.00 each. $309.00 for both FREE SHIP special.
Front Kit is Timbren part no NF-1004A (You must drill out hole to 1/2 in.)
Rear kit is a Jeep kit, JRC01 With a Spacer (Shown) Fits perfect!
Lets start with front, before install, really no problems. But after install a really noticed
much more stable front end especially on corners and under heavy braking. I'd say
this kit is a MUST if you install a Winch bumper that really does have a winch in it.
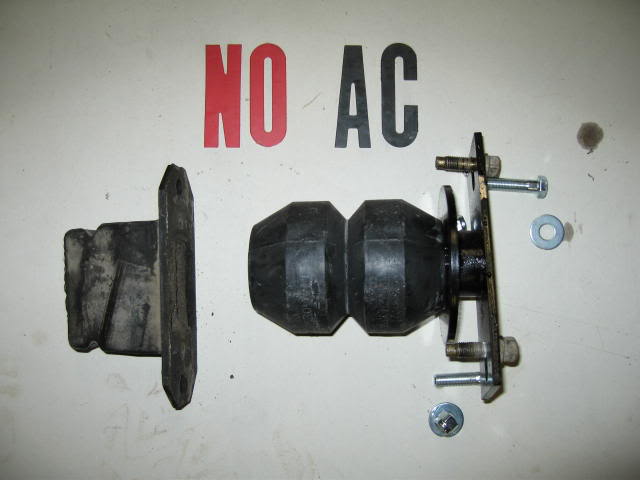
Here is a pic of Front old and new. (Parts)

Jack up vehicle, support, 1/2 in deep socket to remove old bumpstop.
You must then drill hole on lower Control Arm out to 1/2 in. with a drill.
Put washer on bolt, install in hole, add washer on top of LCA then Timbren Bump stop,
tighten. 10 min Max, no need to remove wheel.
Before front, old stuff it almost looks like pure metal but it is rubber.
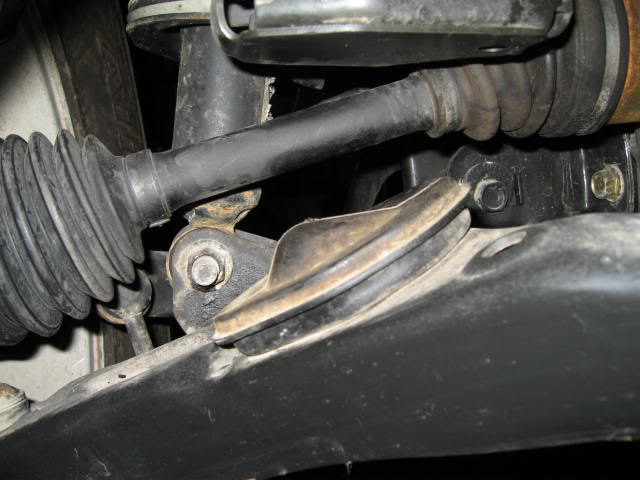
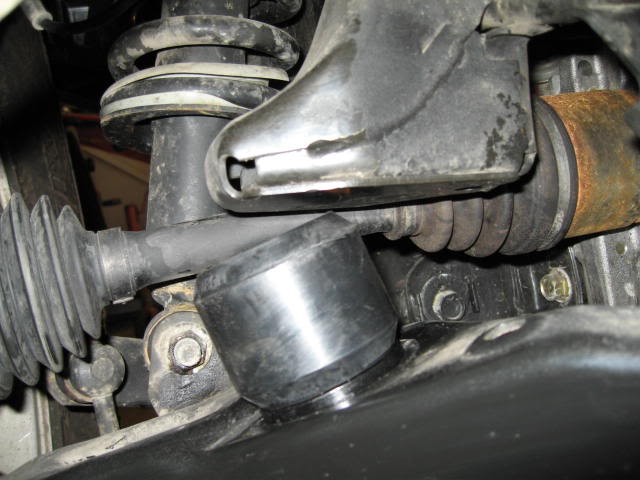
New installed on front. Notice the clearance now, any tip and Timbren takes over!
Rear old and new parts.
No need to remove wheels but makes it a lot easier.
Jack it up, Support, remove wheel. Remove old bumpstop with a 9/16 socket
Clean the area, holding Timbren in your hand, offset goes outboard (If you install it wrong,
it will hit top of U bolts when compressed, it should fall between them.)
Install bolts, snug them, now whack Timbren to rearmost position. Tighten.
Check alignment from side and rear, install tire and check for proper clearances.
After rear from rear.

What's left over & what it took to do the front and rear install.

Thanks for looking. If you do the Mod, and I missed something, PM me and I will add.
MC


