Ok, lets get this out of the weigh, The weight.
 1st step is to read the directions just once and toss them aside! LOL No crap! Black ink was on special and we could not see any of the pictures, it looked like someone tarred, (Not yet feathered) stealing a bowling ball just after a power outage! Enough of the funny stuff, on to the real pictures.
 Your zinc hardware will be in a small package, along with two metal backing
plates that you should prime and paint before install.
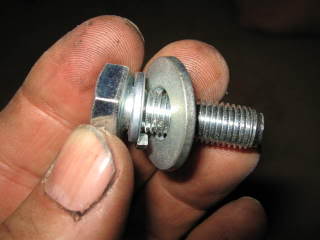
This is the quality hardware for the front.

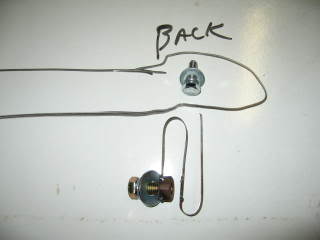
And the hardware for he rear.
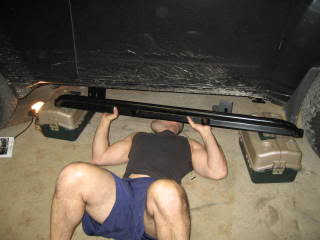
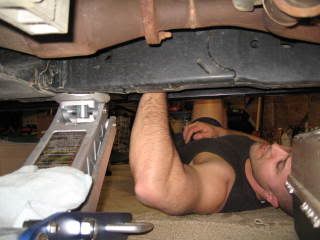
Ok we set a carpet down, and some old tackle boxes to hold slider up.
You grab this fine thread bolt, it goes in thread in frame.
This holds up the rear for the marking of the hole.

We slid a jack in from opposite side, and jacked up the front.
You need to install the front long bolt 1st you can see here where the
backing plate goes, Tighten this just until it starts to bend a bit.
Now snug the other bolt into the bottom as shown. You MUST do this
so that your rear hole you drill lines up properly.
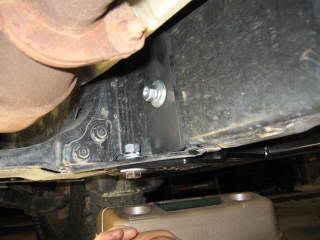
AT this point you have a secure front, and one bolt fairly snug in rear. now,
stand back and look at slider, make sure it is aligned so that it is parallel to the
rocker on the Xterra, nice and level same gap from front to rear. Mark the hole.

Unless you have the mother of all drill bits, (Whatever size it is) you have to
remove the slider and drill. (Or just keep it there and drill if you have right bit.)
We had close size but no cigar, so we remove slider, and drill.
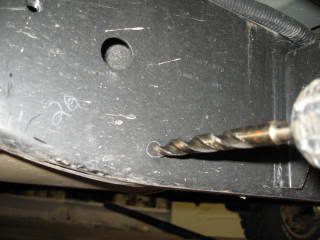
Then we used a step drill bit from Harbor Freight (On sale $10) and drill to size.

Above a right angle drill helps a lot.
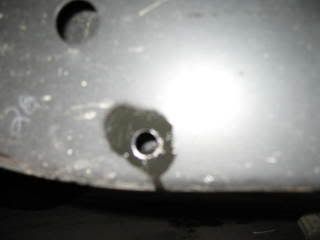
I am always concerned with rust as I have restored some autos and seen
what drill shavings do inside a frame. So I hose it down with Rust converter
to head off rust. This comes in many brands. I use DuPont.
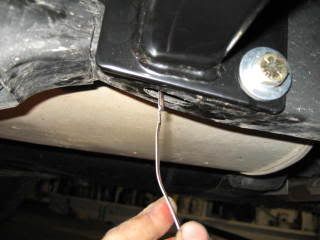
Now you go back and do all that again but loosely this time, install rear bolt,
Front long one, front short one, and come back to the rear and install the last
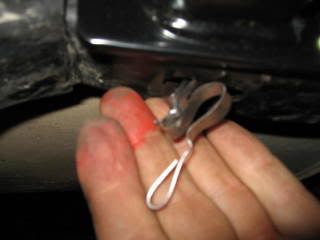
bolt with the funny flat wire that is used to place nut inside this hole into
frame and onto the bolt, this takes some skill, but you will figure it, Basically
get a good light and get nut in frame and flat to frame so you can see it in the
hole and then ease the bolt it, when it catches lightly snug.
Now, re align everything making sure sliders look level and parallel to the rocker.
Tighten it all down now, the Bolt you put in with the wire on it last. We did 90 ft Lbs
You'll get no trouble out of the last bolt, it will tighten just fine and then you take the
wire part of it and tuck it up inside frame in a manner it won't vibrate. This will allow
the removal of the slider in a few years for painting.
The sliders make a great step to load the roof rack.
We bought some tread tape and cut it and rounded the corners and installed it.

And the rear. This stuff is highly suggested.

We also put about a 10" piece on front square part and the 1st 8" of bottom of
the slider, this area gets a lot of blast from front tire and this will prevent wear.
The finished and installed product.

Makes a nice foot rest, Thanks to Mark for the purchase so that we can do this
how to for ya, and letting me interrupt his install 64 and a half times to take a picture.
His dog Tammy didn't seem to mind.

Note, you can save a little of time by having the right size drill bit, but,
removing the slider is not hard and you get a much cleaner hole and no damage
to the powdercoat using this method of removing the slider for drilling. Pay particular
attention to not overtightening the front long bolt (Bending the crap out of backing plate)
and making sure your slider is in exact place you want your X to wear it before marking
your hole to drill. If you mess up, slot that hole with a rat tail file or step drill and that will
allow some adjustment.
MC